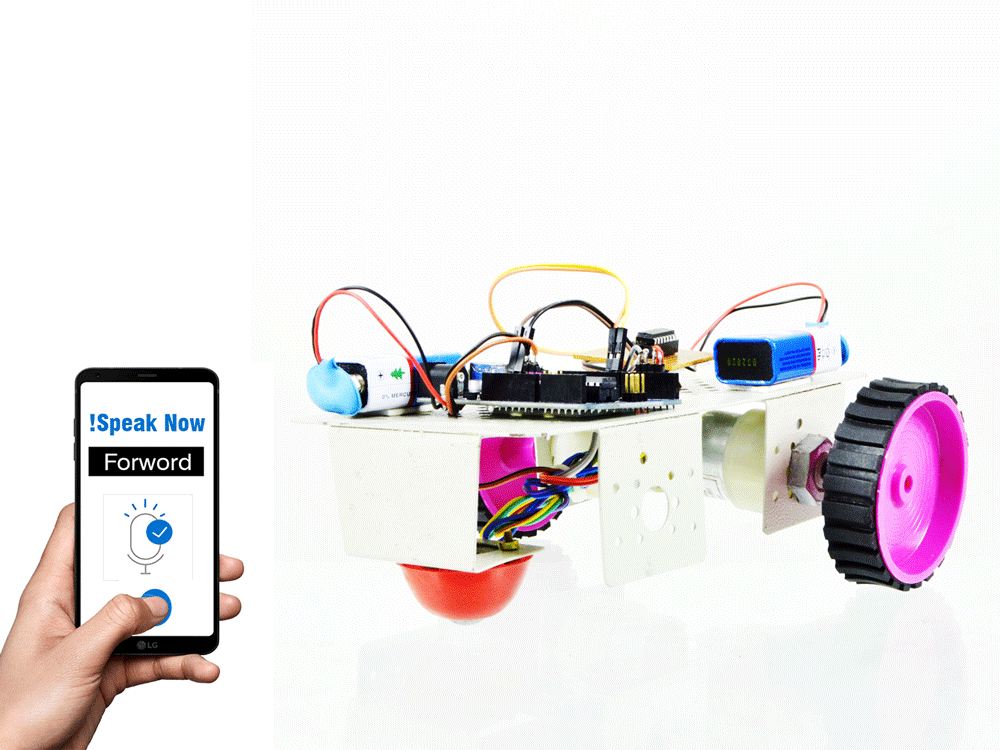
Robot Voice Generator With Text To Speech Coming Soon Circuit Diagram TL;DR Key Takeaways : Building a local AI voice assistant with Raspberry Pi and Home Assistant enhances privacy and data control compared to cloud-based solutions. Step 3: Design and Assemble the Robot. Design your robot's structure. Use a ready-made chassis or create one using cardboard, acrylic, or 3D-printed parts. Assemble the components based on your design. Ensure wiring is secure and components are properly placed. Tip: Watch tutorials on assembling robot kits for guidance. Build your own voice-controlled robot - all you will need is an ESP32 and Microphone board (and some motors etc). You can watch a video of the robot in action here (YouTube):. I'm using a microphone breakout board that I've built myself based around the ICS-43434 - but any microphone board will work.
The purpose of the robot is to create a more human UX for interfacing with ChatGPT. To achieve this goal, the robot will have a microphone/speaker system that enables a user to communicate entirely verbally. The robot will also have multiple anthropomorphic features like blinking/moving eyes and a mouth. Achieved

Controlled Robots With Google Assistant: A Comprehensive ... Circuit Diagram
We're building a voice-controlled robot!In this video, I show how you can build a voice-controlled robot using the ESP32 and TensorFlow Lite.We'll train up a Step 3: Programming the Robot's AI. Programming is where your robot begins to come to life. This step involves writing code that allows your robot to process data and make decisions. Setting Up the Development Environment. Choose a Programming Language: Python is a popular choice due to its simplicity and robust libraries for AI and robotics.

The robotic arm is powered by an Arduino Uno board and uses a Voice Recognition Module V3 to process the voice commands. The voice commands are transmitted wirelessly using the XBee S2C Digi Make a Virtual Assistant AI Robot for Computer Automation and Little Chit Chat. Learn how to create your own voice-controlled robot using limited voice recognition and the power of ESP32 and TensorFlow Lite. Explore wake word detection and Wit.ai integration to enable voice control. Build a two-wheeled robot and train a neural network model for accurate command recognition. Find out the performance of the trained model and discover potential improvements for future projects.