Home Automation using ESP8266 and Telegram Circuit Diagram What is the cost of setting up home automation using ESP8266? The cost depends on the complexity of your home automation and the number of devices you want to control. But generally, ESP8266-based home automation is affordable and cost-effective.
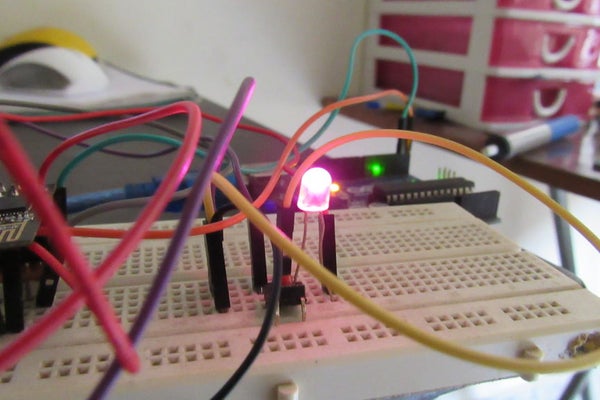
Enter the following WiFi credential and Authentication token in the code: WiFi Name at "WiFi Name"; WiFi Password at "WiFi Password"; Auth Token sent by Blynk at "AUTH TOKEN" Then Goto Tools and select the board as "NodeMCU 1.0 ESP-12E" and the proper PORT in Arduino IDE.. Then click on the upload button to program the NodeMCU board.. After uploading the code, the blue LED You can find Home Automation with esp8266 all over the Instructables but a common thing is that they control their esp through Blynk app. Well, Blynk app is also a good thing for the ESP but there are still some cons. • Firstly, it requires an internet connection so that the app can be connected to it's server.

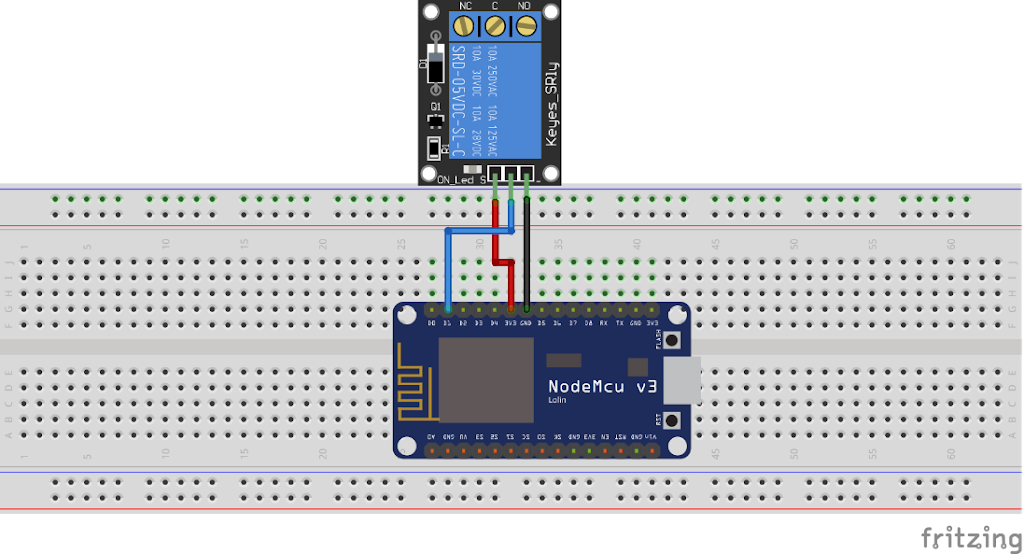
How to make a full home automation system with Nodemcu esp8266 and ... Circuit Diagram
Hello, welcome back. In this tutorial, we will learn how to make a Full home automation system using the Nodemcu ESP8266 and Blynk app. Through this system, we will be able to monitor and control everything in our home. Also, five sensors and a two-channel relay module are mainly used for this system. Home Automation Using ESP8266 (4th Edition) is our step-by-step guide designed to help you get started with this amazing WiFi module called ESP8266. This course includes more than 20 step-by-step projects and it's divided in two distinct parts. PART 1 programs the ESP with the Arduino IDE. PART 2 covers programming the ESP with Lua (NodeMCU In this video, we will learn how to make a home automation system using the Nodemcu ESP8266 board and the new Blynk application. I used a two-channel relay m
In this tutorial, we will learn how to make a home automation system using the Nodemcu ESP8266 board and the new Blynk application. I used a two-channel relay module for that. You can use any other relay module. Like 4-way, 8-way, or 16-way. It depends on your job. Also, the appliances in your home can be connected to these relays.

How to make a home automation system using the Nodemcu ESP8266 board ... Circuit Diagram
Overview: Home Automation using ESP8266 Web Server. In this project, we learn how to make IoT Based Home Automation using ESP8266 Web Server.By Home Automation we mean controlling lighting and appliances without any manual switch but using a system that is connected to the Internet. When connected to the Internet, home devices are an important constituent of the Internet of Things ("IoT"). The heart of today's project is the WiFi enabled board that needs no introduction; the ESP8266 based NodeMCU development board. It is an open source platform for developing WiFi based embedded systems and it is based on the popular ESP8266 WiFi Module, running the Lua based NodeMCU firmware.NodeMCU was born out of the desire to overcome the limitations associated with the first versions of In this project, we learn how to make a Home Automation System using Blynk & ESP8266. One of the most common & Popular Hobby Projects you will come across on the internet is a smart home automation system. Home automation means controlling lights, climate, entertainment systems and appliances without a manual switch.