DIY Solar Charging Station Circuit Diagram In this video, I'll show you how to build a solar charging circuit controlled by an Arduino. You can find the code and circuit diagrams here:https://github.c 3) Solar Charger and Driver Circuit for 10W/20W/30W/50W White High Power SMD LED. The 3rd idea teaches us how to build a simple solar LED with battery charger circuit for illuminating high power LED (SMD) lights in the order of 10 watt to 50 watt. The SMD LEDs are fully safeguarded thermally and from over current using an inexpensive LM 338 Follow these steps to create your own 12-volt solar battery charger. Each section provides crucial instructions for a successful build. Designing the Charger Circuit. Choose a Circuit Configuration: Select a basic circuit design, typically consisting of a solar panel, charge controller, and battery. Ensure the charge controller is compatible

Solar Panel - This image shows the back of the solar panel. On your solar panel in the centre of the left side and the right side you will see a small panel of smooth metal - this is the negative/positive terminals. I have marked the positive side by adding black dots on that side. This solar panel will output a max of 3V at 150ma. The suggested flyback solar charger circuit with I/V checking was created by me bearing in mind the above criticality of a solar panel. Let's understand the information of the circuit by talking about the following diagram below: Right here the IC 741 section is the current administering phase, the IC555 are set up as PWM optimizer while the

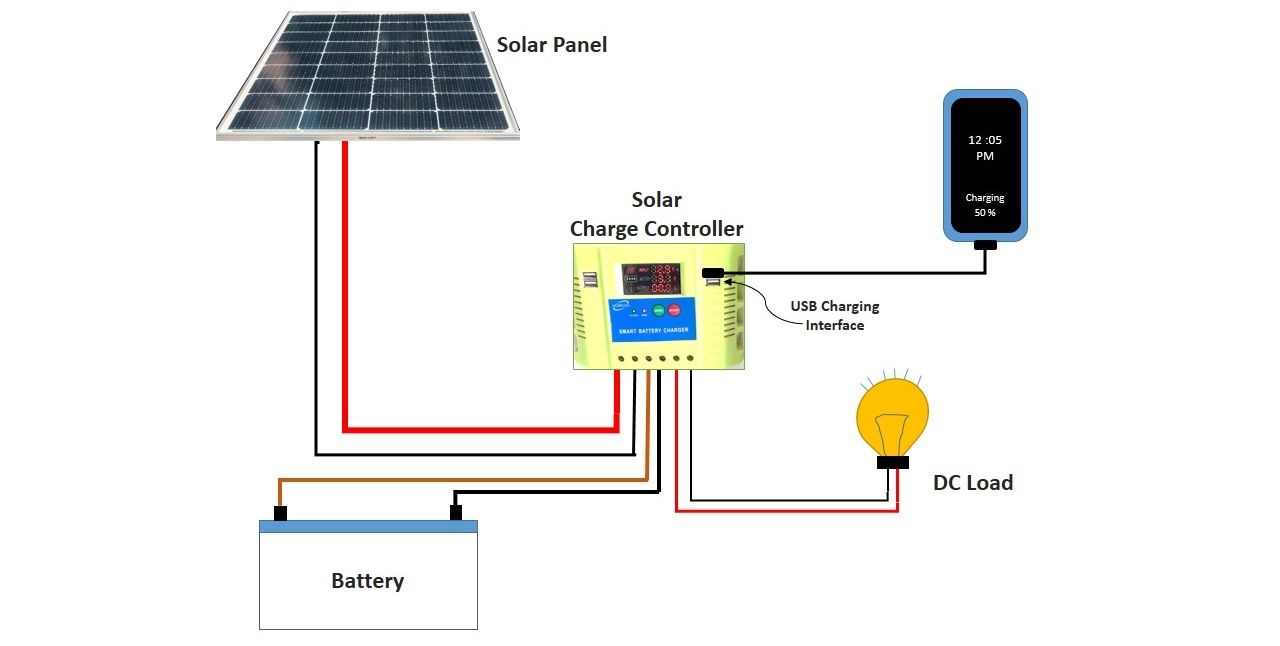
How to Make Solar Powered Battery Charger: A Complete Guide to Building ... Circuit Diagram
Step-By-Step Guide on How to Make Solar Powered Battery Charger. Creating a solar powered battery charger is a straightforward process. This guide provides detailed steps to help you build your own charger effectively. Designing the Circuit. Select Your Components: Choose solar panels, a charge controller, and a battery type. For example, a 8. Test the solar battery charger. Confirm that your circuit works by testing it. First, look at what you have, and ensure all your components are in place. Using your voltmeter, check the voltages for every stage of the circuit. The charging voltage should read about 4.2V.
Learn how to create your own solar battery charger with our comprehensive guide! Whether you're a DIY novice or an experienced builder, this article walks you through selecting the right materials, building an efficient circuit, and maintaining your charger for peak performance. Discover various types of solar chargers and harness solar energy sustainably to power your devices outdoors or