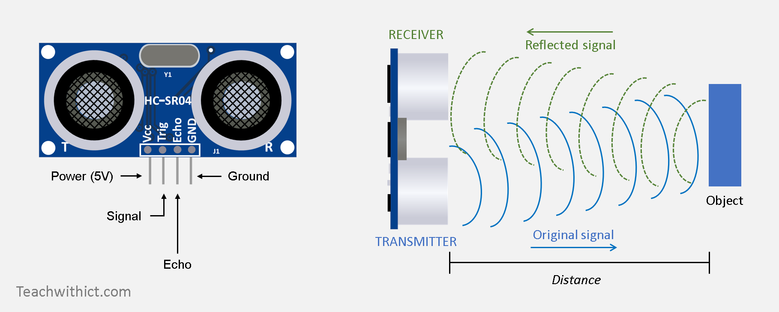
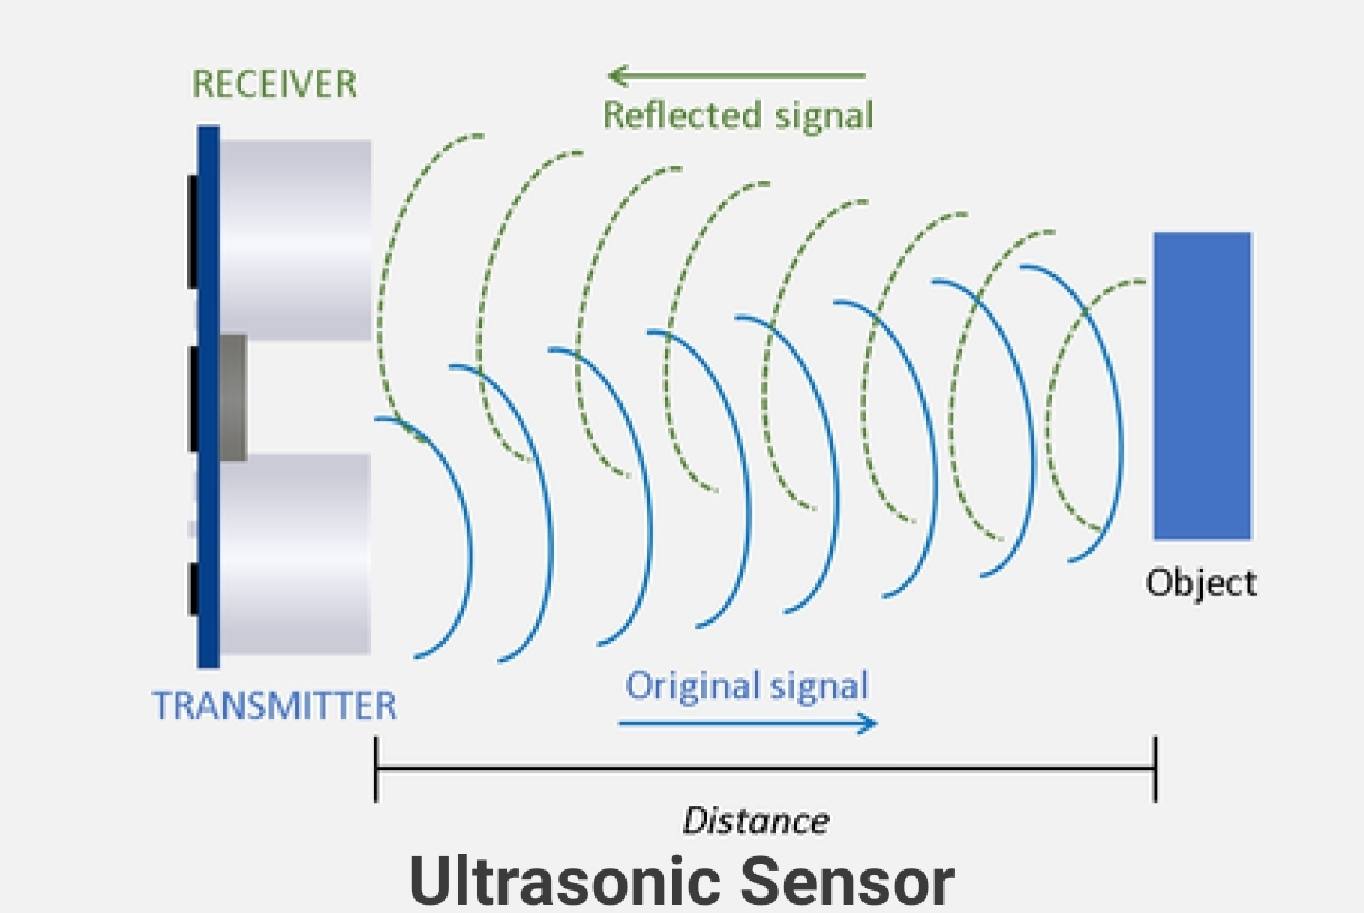
Detection Task Using Ultrasonic Sensors Lab 3 Circuit Diagram Learn how to use the ultrasonic sensor (HC-SR04) with Arduino. This tutorial will teach you what it is, how to assemble the sensor on Arduino, and, at the end, you'll implement it into an alarm system project. Ultrasonic sensor with Arduino - Complete Guide. In Arduino based ultrasonic range finder, we send a PING sound wave using a transmitter of HCSR04 after that the PING is returned by reflecting any object & the receiver detect this. Then Arduino calculates how many times take it to return & measure the object distance from the ultrasonic sensor.

The factor of 2 is because the sound wave travels to the object and back. How an Ultrasonic Sensor Works Connect Ultrasonic Sensor with Arduino Wiring Diagram. To use the HC-SR04 ultrasonic sensor with Arduino, connect four pins: VCC, GND, Trig (Trigger), and Echo. Below is a simple wiring guide: VCC: Connect to the 5V pin on the Arduino. The delay between the transmission and reception of the sound gives an indication as to how far or how near an object is. The ultrasonic sensor is another type of proximity sensor. These proximity sensors all use the basic detection principle. The sensor emits a signal which will bounce back once it detects an obstacle.

Arduino Tutorial - Arduino Getting Started Circuit Diagram
1. Ultrasonic sensor(hc-sr04) 2. led. 3.resistor(your wish with led) 4. arduino. 5. jumper wires. The connection is pretty simple ultrasonic sensors have 4 pins namely: trig,echo,vcc,gnd to be connected with arduino . The echo pin is connected to the arduino digital pin 5 and the trigg pin of sensor is connected to digital pin 13 of the arduino . #Ultrasonic Sensor is used for the precise detection of objects. The ultrasonic transceivers, that are the #transmitters and #receivers, use the concept of converting electrical energy into ultrasonic sound. The ultrasonic sensor emits sound waves at a frequency above human hearing and calculates the distance of any object or obstacle in its path.
Learn how to use ultrasonic sensor HC-SR04 with Arduino, how ultrasonic sensor works, how to connect ultrasonic sensor to Arduino, how to code for ultrasonic sensor, how to program Arduino step by step. The detail instruction, code, wiring diagram, video tutorial, line-by-line code explanation are provided to help you quickly get started with Arduino. Find this and other Arduino tutorials on

SR04 Ultrasonic Sensor, Arduino and ... Circuit Diagram
This video explains to you - How to detect an object using an ultrasonic sensor, Arduino Uno, and buzzer??The video starts by explaining the circuit diagram
The first tab with main and loop -"Ultrasonic_Sensors_to_Detect_Obstacles". In the Range.h tab is written the class for ultrasonic sensor, and in Timer.h is the timer class. Let's us see the code in each of the three tabs: 3.1 Ultrasonic_Sensors_to_Detect_Obstacles
